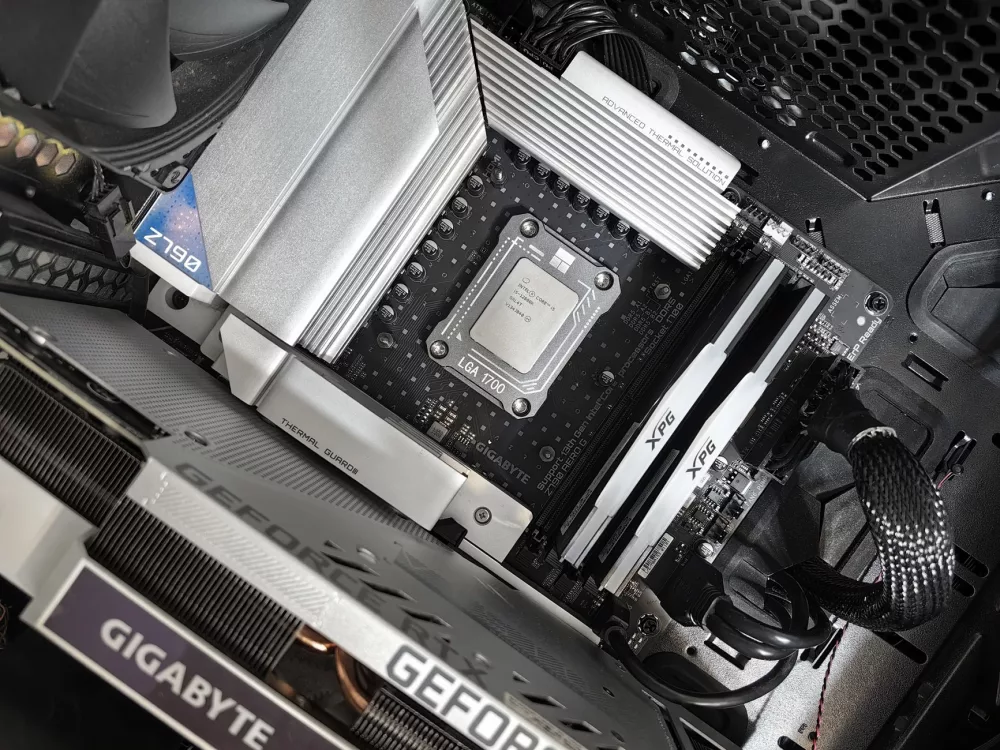
Hey there, fellow tech enthusiasts and aspiring PC builders! Have you ever thought about diving into the world of PC building but felt a bit intimidated by the sheer number of components and compatibility issues? Well, you're absolutely not alone. For a long time, building a gaming PC from scratch meant meticulously researching individual parts, cross-referencing compatibility charts, and hoping you didn't forget a crucial cable. It could be a daunting experience for someone just starting out. That's precisely where gaming PC build kits step in – they're designed to make the journey smoother, more accessible, and honestly, a lot more fun.
What Exactly is a Gaming PC Build Kit?
When we talk about a gaming PC build kit, we're generally referring to a curated package of components that are guaranteed to work together. Think of it as a pre-selected set of parts that you assemble yourself, rather than buying a fully pre-built system. It's a fantastic middle-ground solution, offering the satisfaction of building your own machine without the headache of component selection. I've seen these kits range from basic bundles including just the core trinity (CPU, motherboard, RAM) to almost complete systems missing only the operating system. It really depends on the vendor and their specific offering.
Why Consider a Build Kit Over a Pre-Built or Full DIY?
- Learning Experience: This is a big one for me. You get hands-on experience with each component. You'll learn how a CPU locks into its socket, how RAM clicks into place, and where all those pesky cables connect. This knowledge is invaluable if you ever want to upgrade or troubleshoot your PC down the line. It's not just about getting a machine; it's about understanding it.
- Cost-Effectiveness: Often, kits can offer a slight cost advantage over buying individual components if you catch a good deal. Retailers sometimes bundle parts to move inventory, passing savings onto you. While a full DIY build might allow for more granular price hunting, kits simplify the process considerably. You won't be paying the 'convenience tax' of a fully assembled system either.
- Guaranteed Compatibility: This is arguably the biggest selling point. The vendor has already done the legwork to ensure the CPU, motherboard, RAM, and often the GPU, are all compatible. This eliminates a huge source of anxiety for new builders. No more worrying about socket types or RAM speeds not matching!
- Customization (to a degree): While not as open-ended as a full DIY build, many kits offer options. You might pick different storage drives, select a specific GPU tier, or choose a case from a small selection. It’s a nice balance between guidance and personal choice.
- The Satisfaction of Building: There's truly nothing like hitting that power button for the first time and seeing your creation spring to life. It's a unique sense of accomplishment that a pre-built machine just can't provide.
What Components Can You Expect in a Kit?
A good gaming PC build kit will typically include most, if not all, of the core components needed to get a system up and running. Let's break down what you're likely to find:
- CPU (Central Processing Unit): The brain of your computer. You'll usually find an Intel Core i5/i7/i9 or an AMD Ryzen 5/7/9, depending on the kit's performance tier.
- GPU (Graphics Processing Unit): This is the heart of any gaming PC. Expect to see NVIDIA GeForce RTX cards or AMD Radeon RX cards. The power of this component largely dictates your gaming performance.
- Motherboard: The central nervous system, connecting everything. The kit will include one compatible with your chosen CPU.
- RAM (Random Access Memory): Modules that temporarily store data. Typically, you'll get 16GB or 32GB of DDR4 or DDR5 RAM, essential for smooth multitasking and gaming.
- Storage: Usually an NVMe SSD for fast boot times and game loading. Some kits might include a secondary, larger HDD for mass storage, but SSDs are the standard for gaming these days.
- PSU (Power Supply Unit): Converts AC power from your wall socket into DC power for your components. The kit will provide one with sufficient wattage for all included parts.
- PC Case: This houses everything. Kits usually come with a well-ventilated case, often with tempered glass panels and RGB lighting for that gamer aesthetic.
- CPU Cooler: If the CPU doesn't come with a stock cooler (or if it's a higher-end chip), the kit will include an aftermarket air cooler or an AIO (All-in-One) liquid cooler.
- Cables & Accessories: All the necessary power cables, SATA cables (if applicable), screws, and often a few zip ties for cable management.
Before You Buy: Key Considerations
Picking the right kit isn't just about grabbing the first one you see. You've got some thinking to do.
Your Budget
Naturally, this is often the biggest factor. Kits range widely in price, from entry-level builds perfect for 1080p gaming to high-end monsters ready for 4K. Set a realistic budget and stick to it.
Performance Goals
What kind of games do you play? At what resolution and frame rate do you want to play them? A kit built for esports titles at 1080p won't cut it if you're aiming for graphically intensive AAA games at 1440p or 4K. Be honest with yourself about your expectations.
Technical Skill Level
While kits simplify things, you still need to be comfortable with a screwdriver and following instructions. If you're completely new, look for kits with very clear, step-by-step guides, or even video tutorials from the vendor. Most kits are designed to be beginner-friendly, but a little patience goes a long way!
Upgradeability
Think long-term. Does the motherboard have extra RAM slots? Can it support a more powerful CPU down the line without needing a full swap? What about extra storage bays? A good kit considers future expansion.
The Building Process: An Overview
Alright, so you've got your kit! What happens next? The building process is usually quite straightforward, especially with a good instruction manual. I generally start with the motherboard outside the case.
- Motherboard Prep: Install the CPU into the socket, making sure to align the triangle markers. Gently secure the retention arm.
- Cooler Installation: Mount the CPU cooler. If it's an air cooler, apply thermal paste (if not pre-applied) and secure it. For an AIO, you'll mount the block to the CPU and the radiator to the case later.
- RAM Installation: Snap the RAM sticks into the appropriate slots on the motherboard, applying even pressure until they click.
- Test Fit (Optional but Recommended): Some builders like to do a quick 'outside-the-case' POST test here with just the CPU, cooler, RAM, and PSU connected to ensure these core components are functional before everything goes into the case.
- Mount Motherboard in Case: Install the I/O shield (if not integrated) and carefully screw the motherboard into the standoffs within the case.
- GPU Installation: Insert your graphics card into the top PCIe slot until it clicks, then secure it with a screw.
- Storage Installation: Mount your NVMe SSD directly to the motherboard. If you have any 2.5-inch or 3.5-inch drives, install them in their respective bays in the case.
- PSU Installation & Cable Management: Mount the power supply, then start connecting all the necessary cables – motherboard power (24-pin and CPU 8-pin), GPU power, and storage power. Take your time with cable management; it makes a huge difference to airflow and aesthetics.
- Final Touches: Connect case fans, front panel connectors (USB, audio, power/reset buttons – these can be tricky!), and any RGB headers.
- OS Installation: Once built, you'll need to install your operating system (Windows, Linux, etc.) from a USB drive.
Don't Panic: Common Troubleshooting Steps
Even with a kit, sometimes things don't go perfectly on the first try. I've been there! Here are some common issues and quick fixes:
- No POST (Power-On Self-Test), No Display: Check all power connections, especially the 24-pin motherboard power and 8-pin CPU power. Ensure RAM sticks are fully seated. Try re-seating the GPU.
- Fans Spin, No Display: This often points to the GPU or RAM. Double-check GPU power cables. Try removing one RAM stick at a time if you have multiple. Make sure your monitor is plugged into the GPU, not the motherboard's integrated graphics port (unless you're using integrated graphics).
- System Powers On, Then Off Immediately: This could be a short circuit or an issue with the CPU cooler. Ensure the cooler is properly mounted and making good contact. Check for any loose screws or components touching the motherboard where they shouldn't.
Post-Build: The Fun Part!
Once your PC boots into the operating system, you're not quite done, but the hardest part is over. Your next steps should include:
- Driver Installation: Install motherboard chipset drivers, GPU drivers (critical for gaming performance!), and any other peripheral drivers.
- Windows Updates: Run all pending updates.
- Benchmarks and Testing: Run some synthetic benchmarks (like 3DMark or Cinebench) or jump into your favorite games to see how your new machine performs. This helps ensure everything is stable.
- Optimization: Adjust fan curves, tweak graphics settings in games, and personalize your OS experience.
Building your own gaming PC, even from a kit, is an incredibly rewarding experience. It demystifies the technology and gives you a powerful machine tailored (at least somewhat) to your needs. If you've been on the fence about building, I really think a well-chosen gaming PC build kit is the perfect way to get started. You'll learn a ton, save a bit of money, and end up with a rig you can truly call your own!